How to build an OIDC provider using rodauth-oauth on Rails
15 Mar 2021One of my most recent ruby open-source projects is rodauth-oauth, a rack-based toolkit to help easily build OAuth and OpenID Connect providers, built on top of rodauth (the most advanced authentication provider library for ruby). I summarized my initial motivation for “rolling my own” in the project Wiki, namely the lack of a decent framework-agnostic alternative (I didn’t want to have to use Rails), and what I perceived as the limitations of the “de-facto” OAuth provider Rails extension, “doorkeeper”.
One less known “feature” of rodauth-oauth, given the initial motivation, is that it can be used with Rails. In fact, around the same time I started working on rodauth-oauth, Janko Mahronic started rodauth-rails, which aimed at making the integration of rodauth in rails as seamless as any other rails-friendly authentication gem. So after I got my early proof-of-concept, I made supporting rodauth-rails a priority. Both gems have grown since then.
Although there’s enough documentation on how to set it up with Rails, I’ve never got to write any free-form HOW-TO guides. Janko has been actively releasing articles about rodauth-rails, so I think it’s time I should do the same as well.
So, what does it take to start an OpenID Connect Provider on Rails using rodauth-oauth?
Our first step would be to bootstrap a Rails app, integrate rodauth (via rodauth-rails), add some basic CRUD/resources and authentication… sounds like a lot of work. Fortunately, Janko already did the work of providing such a demo app, that I will use as my starting point. It’s a very simple app, which manages posts behind some authentication-driven authorship.
For more information about this example app, make sure to read:
- Adding Authentication in Rails 6 with Rodauth
- Adding Multifactor Authentication in Rails 6 with Rodauth
In order to make this more interesting, this app will also be a “resource server” (in OAuth “parlance”), given access to user posts via the “posts.read” scope.
So let’s get this started with!
1. rodauth-rails
After cloning the project, I ran the following commands:
> bundle install
> bundle exec rails db:create (make sure you have "postgresql" installed)
> bundle exec rails db:migrate
> bundle exec rails server
And my app is running under “http://localhost:3000”. I open my browser and:
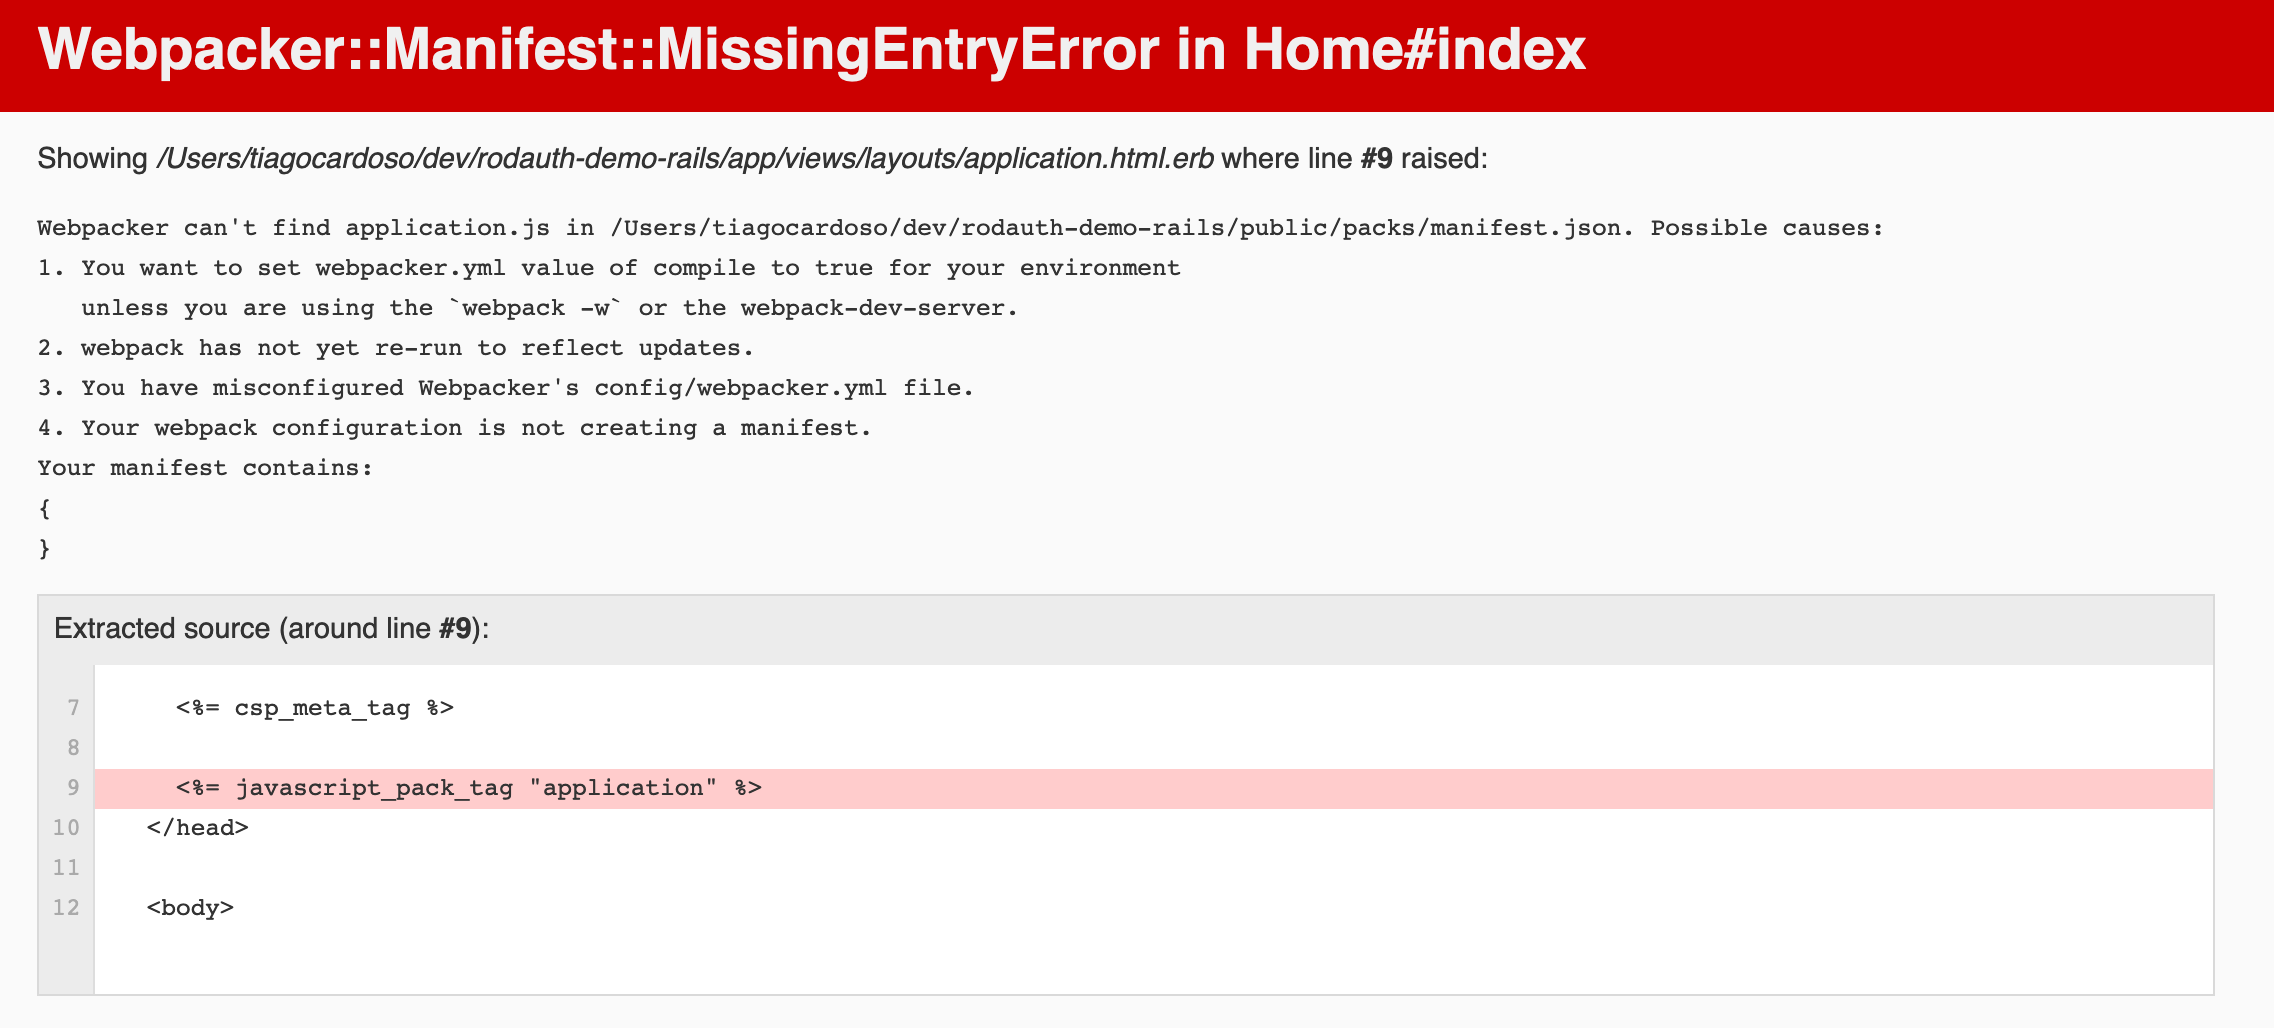
Oh, bummer. I guess I need more “wheels” for rails 6. Thanks, rails.
After a couple of searches about the topic, I run:
bundle exec rails webpacker:installbundle exec bin/webpack-dev-server
I have another look at the browser:

And we’re up and running! I create and verify a Tester acccount then:
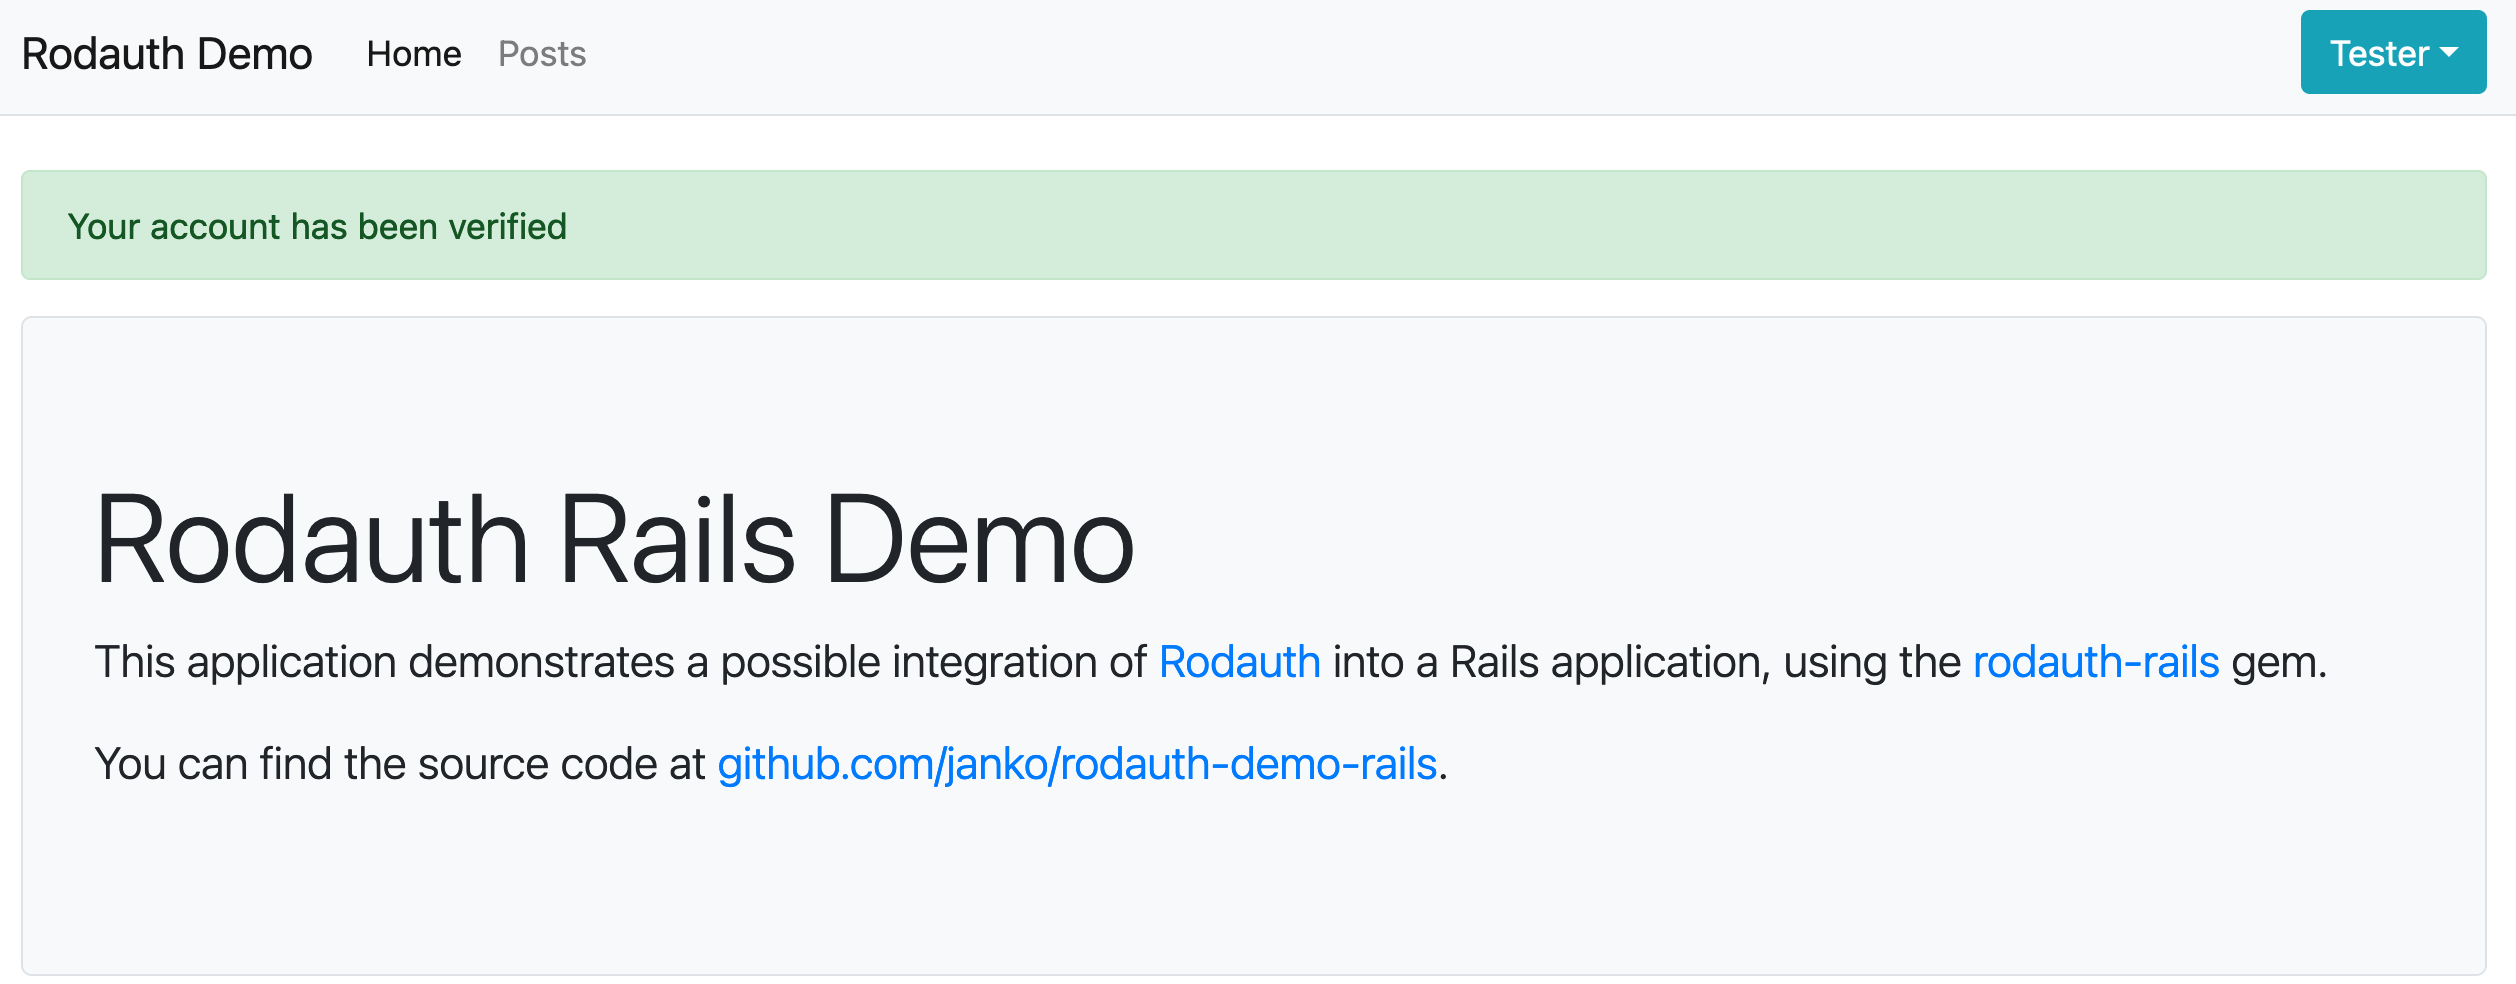
And we’re up and running!
2. install rodauth-oauth
In order to integrate rodauth-oauth in rails, we’re going to add the gem to our Gemfile and follow the instructions from the wiki.
# Gemfile
gem "rodauth-oauth"
2.1. run the db-level generator
Next we run the following command:
> bundle exec rails generate rodauth:oauth:install
create  db/migrate/20210316141438_create_rodauth_oauth.rb
create  app/models/oauth_application.rb
create  app/models/oauth_grant.rb
create  app/models/oauth_token.rb
This generator creates all the following resources: the OAuth Token, Grant and Application models, and a single migration file to create all the related database-level resources. One is supposed to tweak this migration depending of the features to enable, so this is what a DB schema for an OIDC provider would look like:
# db/migrate/20210316141438_create_rodauth_oauth.rb
class CreateRodauthOAuth < ActiveRecord::Migration[6.1]
  def change
    create_table :oauth_applications do |t|
      t.integer :account_id
      t.foreign_key :accounts, column: :account_id
      t.string :name, null: false
      t.string :description, null: false
      t.string :homepage_url, null: false
      t.string :redirect_uri, null: false
      t.string :client_id, null: false, index: { unique: true }
      t.string :client_secret, null: false, index: { unique: true }
      t.string :scopes, null: false
      t.datetime :created_at, null: false, default: -> { "CURRENT_TIMESTAMP" }
    end

    create_table :oauth_grants do |t|
      t.integer :account_id
      t.foreign_key :accounts, column: :account_id
      t.integer :oauth_application_id
      t.foreign_key :oauth_applications, column: :oauth_application_id
      t.string :type, null: true
      t.string :code, null: true
      t.string :token, token: true, unique: true
      t.string :refresh_token, unique: true
      t.datetime :expires_in, null: false
      t.string :redirect_uri
      t.datetime :revoked_at
      t.string :scopes, null: false
      t.datetime :created_at, null: false, default: -> { "CURRENT_TIMESTAMP" }
      # for using access_types
      t.string :access_type, null: false, default: "offline"
      # uncomment to enable PKCE
      # t.string :code_challenge
      # t.string :code_challenge_method
      # uncomment to use OIDC nonce
      t.string :nonce
      t.string :acr
      t.index(%i[oauth_application_id code], unique: true)
    end
  end
end
Then I run bundle exec rails db:migrate one more time.
2.2. Configure oauth/oidc options
Again, you should adjust this to the features you want to enable. This is an example of what I consider a “good enough” configuration for this tutorial:
# in lib/rodauth_app.rb
#
# Declare public and private keys with which to sign the id_token
# PRIV_KEY = OpenSSL::PKey::RSA.new(File.read("path/to/privkey.pem"))
# PUB_KEY = OpenSSL::PKey::RSA.new(File.read("path/to/pubkey.pem"))

enable :create_account, :verify_account, ....., :oidc,
  :oauth_application_management # for the purposes of this demonstration

# ...


# list of OIDC and OAuth scopes you handle
oauth_application_scopes %w[openid email profile posts.read]

# by default you're only allowed to use https redirect URIs. But we're developing,
# so it's fine.
if Rails.env.development?
  oauth_valid_uri_schemes %w[http https]
end

# private key to sign ID Tokens with
oauth_jwt_keys("RS256" => PRIV_KEY)
# public key with which applications can verify ID Tokens
oauth_jwt_public_keys("RS256" => PUB_KEY)

# this callback is executed when gathering OIDC claims to build the
# ID token with.
# You should return the values for each of these claims.
#
# This callback is called in a loop for all available claims, so make sure
# you memoize access to to the database models to avoid the same query
# multiple times.
get_oidc_param do |account, param|
  @profile ||= Profile.find_by(account_id: account[:id])
  case param
  when :email
    account[:email]
  when :email_verified
    account[:status] == "verified"
  when :name
    @profile.name
  end
end

# ...

route do |r|
  ...
  r.rodauth # route rodauth requests
  rodauth.oauth_applications # oauth application management dashboard
  # OpenID specific, enable service discovery
  rodauth.openid_configuration
  rodauth.webfinger
Consider reading the security recommendations at this point as well.
2.3. Generate the views
Now I run the following command:
> bundle exec rails generate rodauth:oauth:views -a
create  app/views/rodauth/authorize.html.erb
create  app/views/rodauth/oauth_applications.html.erb
create  app/views/rodauth/oauth_application.html.erb
create  app/views/rodauth/new_oauth_application.html.erb
I ran it with -a[ll] because I’ll be showcasing the Oauth Applications management, which is optional. You’re recommended to bootstrap new client applications using dynamic client registration.
3.a Use (OIDC) dynamic client registration
The most straightforward way of creating client applications is by using the oidc_dynamic_client_registration feature and the provider /register endpoint.
Attention: don’t forget to set up some sort of authentication on the registration endpoist. Here’s an example:
# lib/rodauth_app.rb
before_register do
  secret_code = request.env["HTTP_AUTHORIZATION"]
  authorization_required unless secret_code = "12345678"
  @oauth_application_params[:account_id] = _account_from_login("foo@bar.com")[:id]
end
And then you can:
curl -X POST http://localhost:3000/register \
  -F "client_name=Client Posts App" \
  -F "description=A app showing my posts from this one" \
  -F "client_uri=http://localhost:9293" \
  -F "redirect_uris[]=http://localhost:9293/auth/openid_connect/callback" \
  -F "scopes=openid email profile posts.read"
# take client id and client secret from the response payload
3.b Make OAuth Applications Management available (optional)
At this point, your users should be able to navigate to the oauth applications management page, which means, there should be a link somewhere. Given that the demo app has a navbar, I’ll just add it there:
</li>
+ <% if rodauth.logged_in? %>
+   <li class="nav-item <%= "active" unless current_page?(rodauth.oauth_applications_path) %>">
+     <%= link_to_unless_current "Client Applications", rodauth.oauth_applications_path, class: "nav-link" %>
+   </li>
+ <% end %>
And voilà!
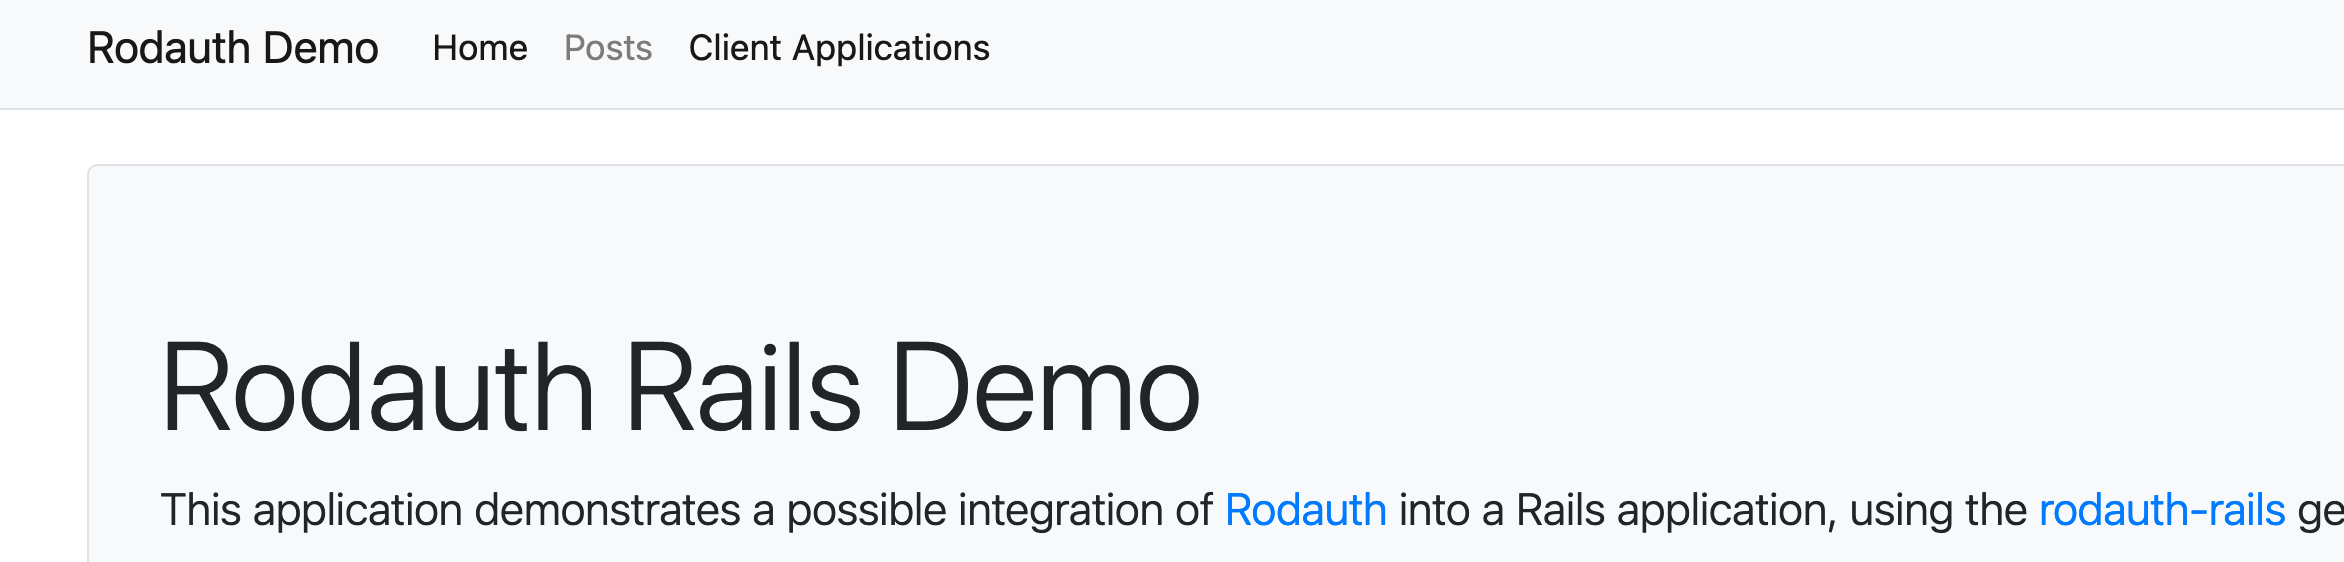
And when I follow the link:
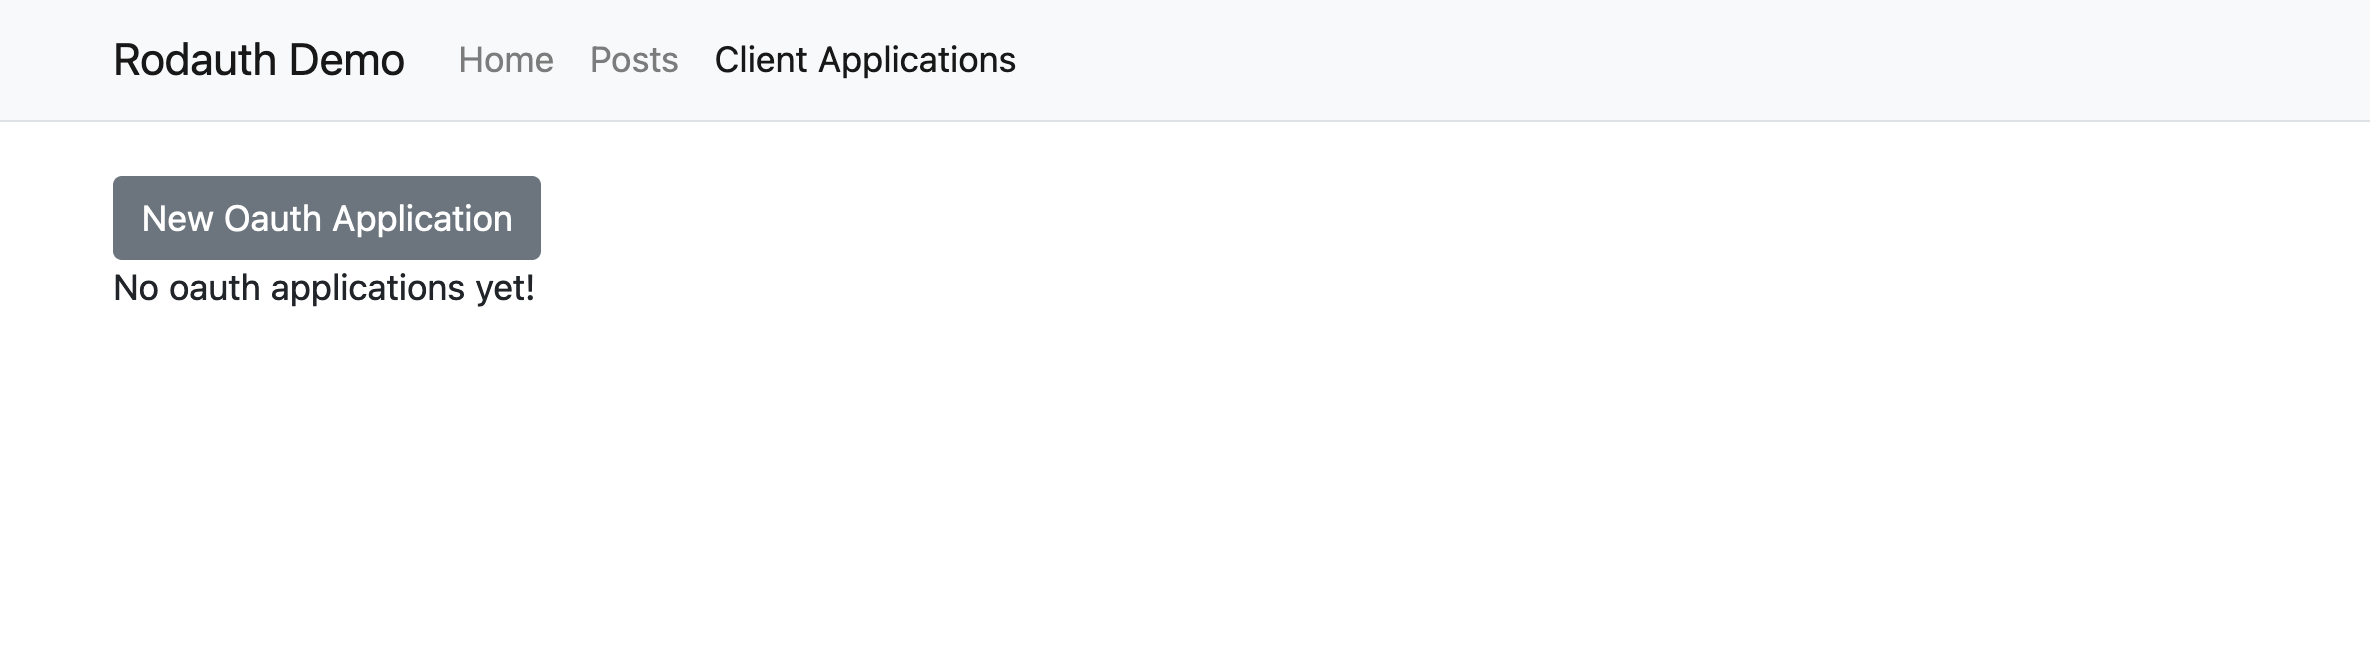
Looks weird, I know. But hey, we have a dashboard for our test user’s oauth client applications. So let’s start filling it up:
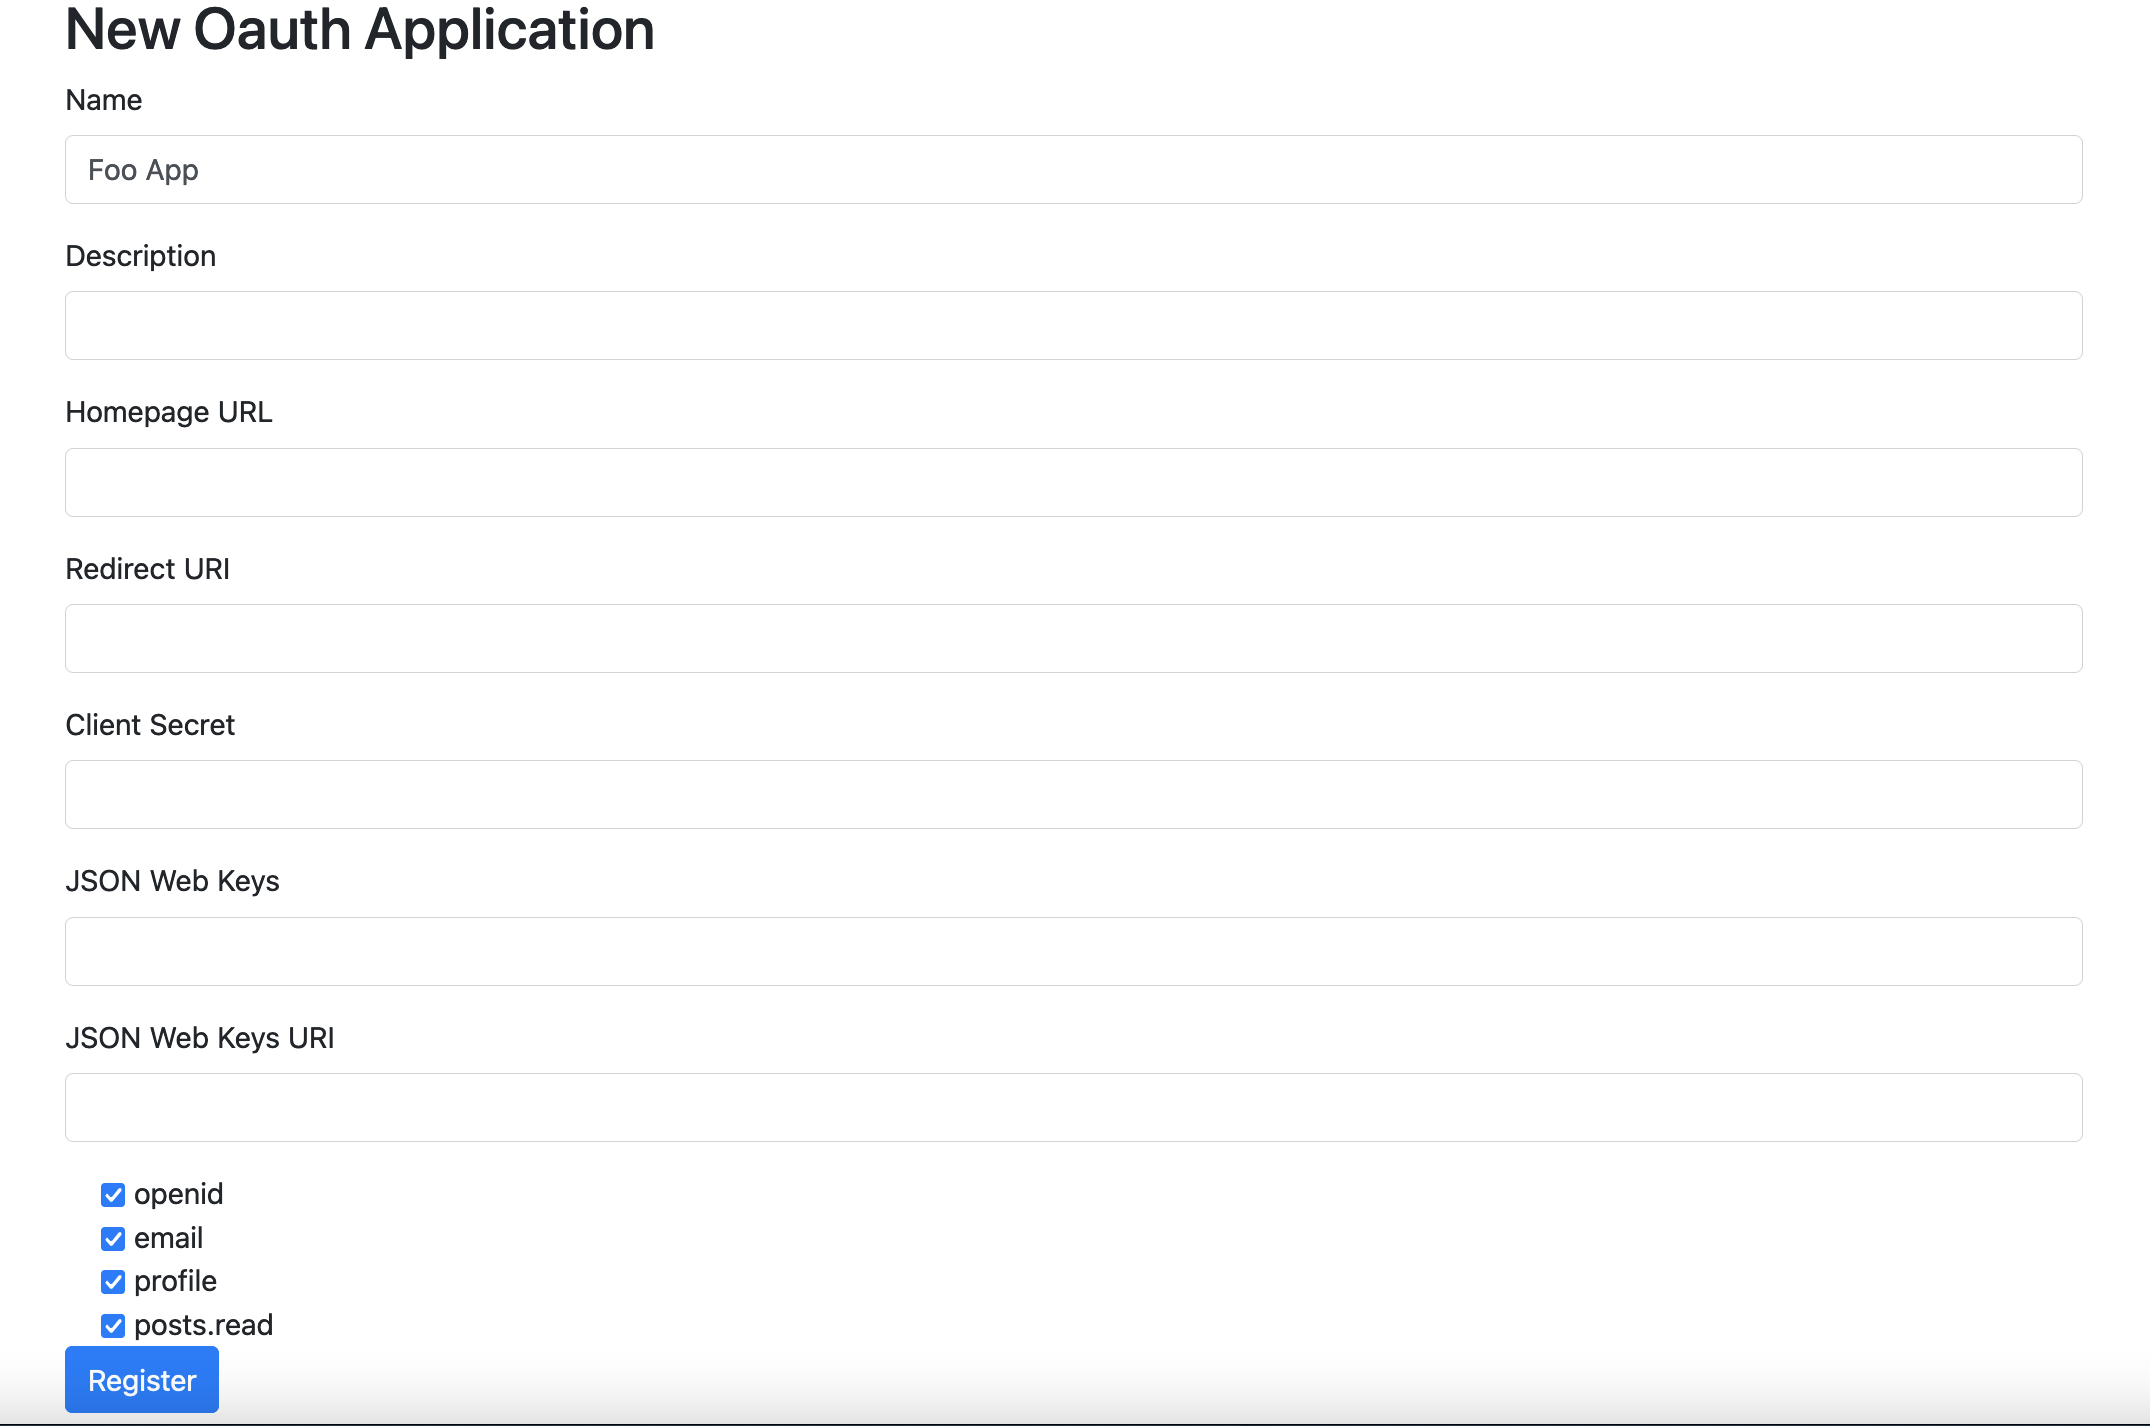
Some things to pay attention to in this form:
- “Name” and “Description” fields can be used in the Authorization Form, to inform the user on which application is requesting which permissions.
- “Homepage URL” and “Redirect URL” are URLs from the client application being registered, the second being the URL the user will be redirected to after authorizing the client application. In production, as per the configuration notes, these URLs must be https. However, for demonstration purposes, we’ll be using a client application running in http://localhost:9293.
- “Secret” is an input.
rodauth-oauthwill hash it before storing it by default. - “JSON Web Keys” and “JSON Web Keys URI” are exclusive: you either set one or the other (or none; I’m going to remove them from the form, as for the purposes of this demonstration, they’re not required).
So, I fill up the form:
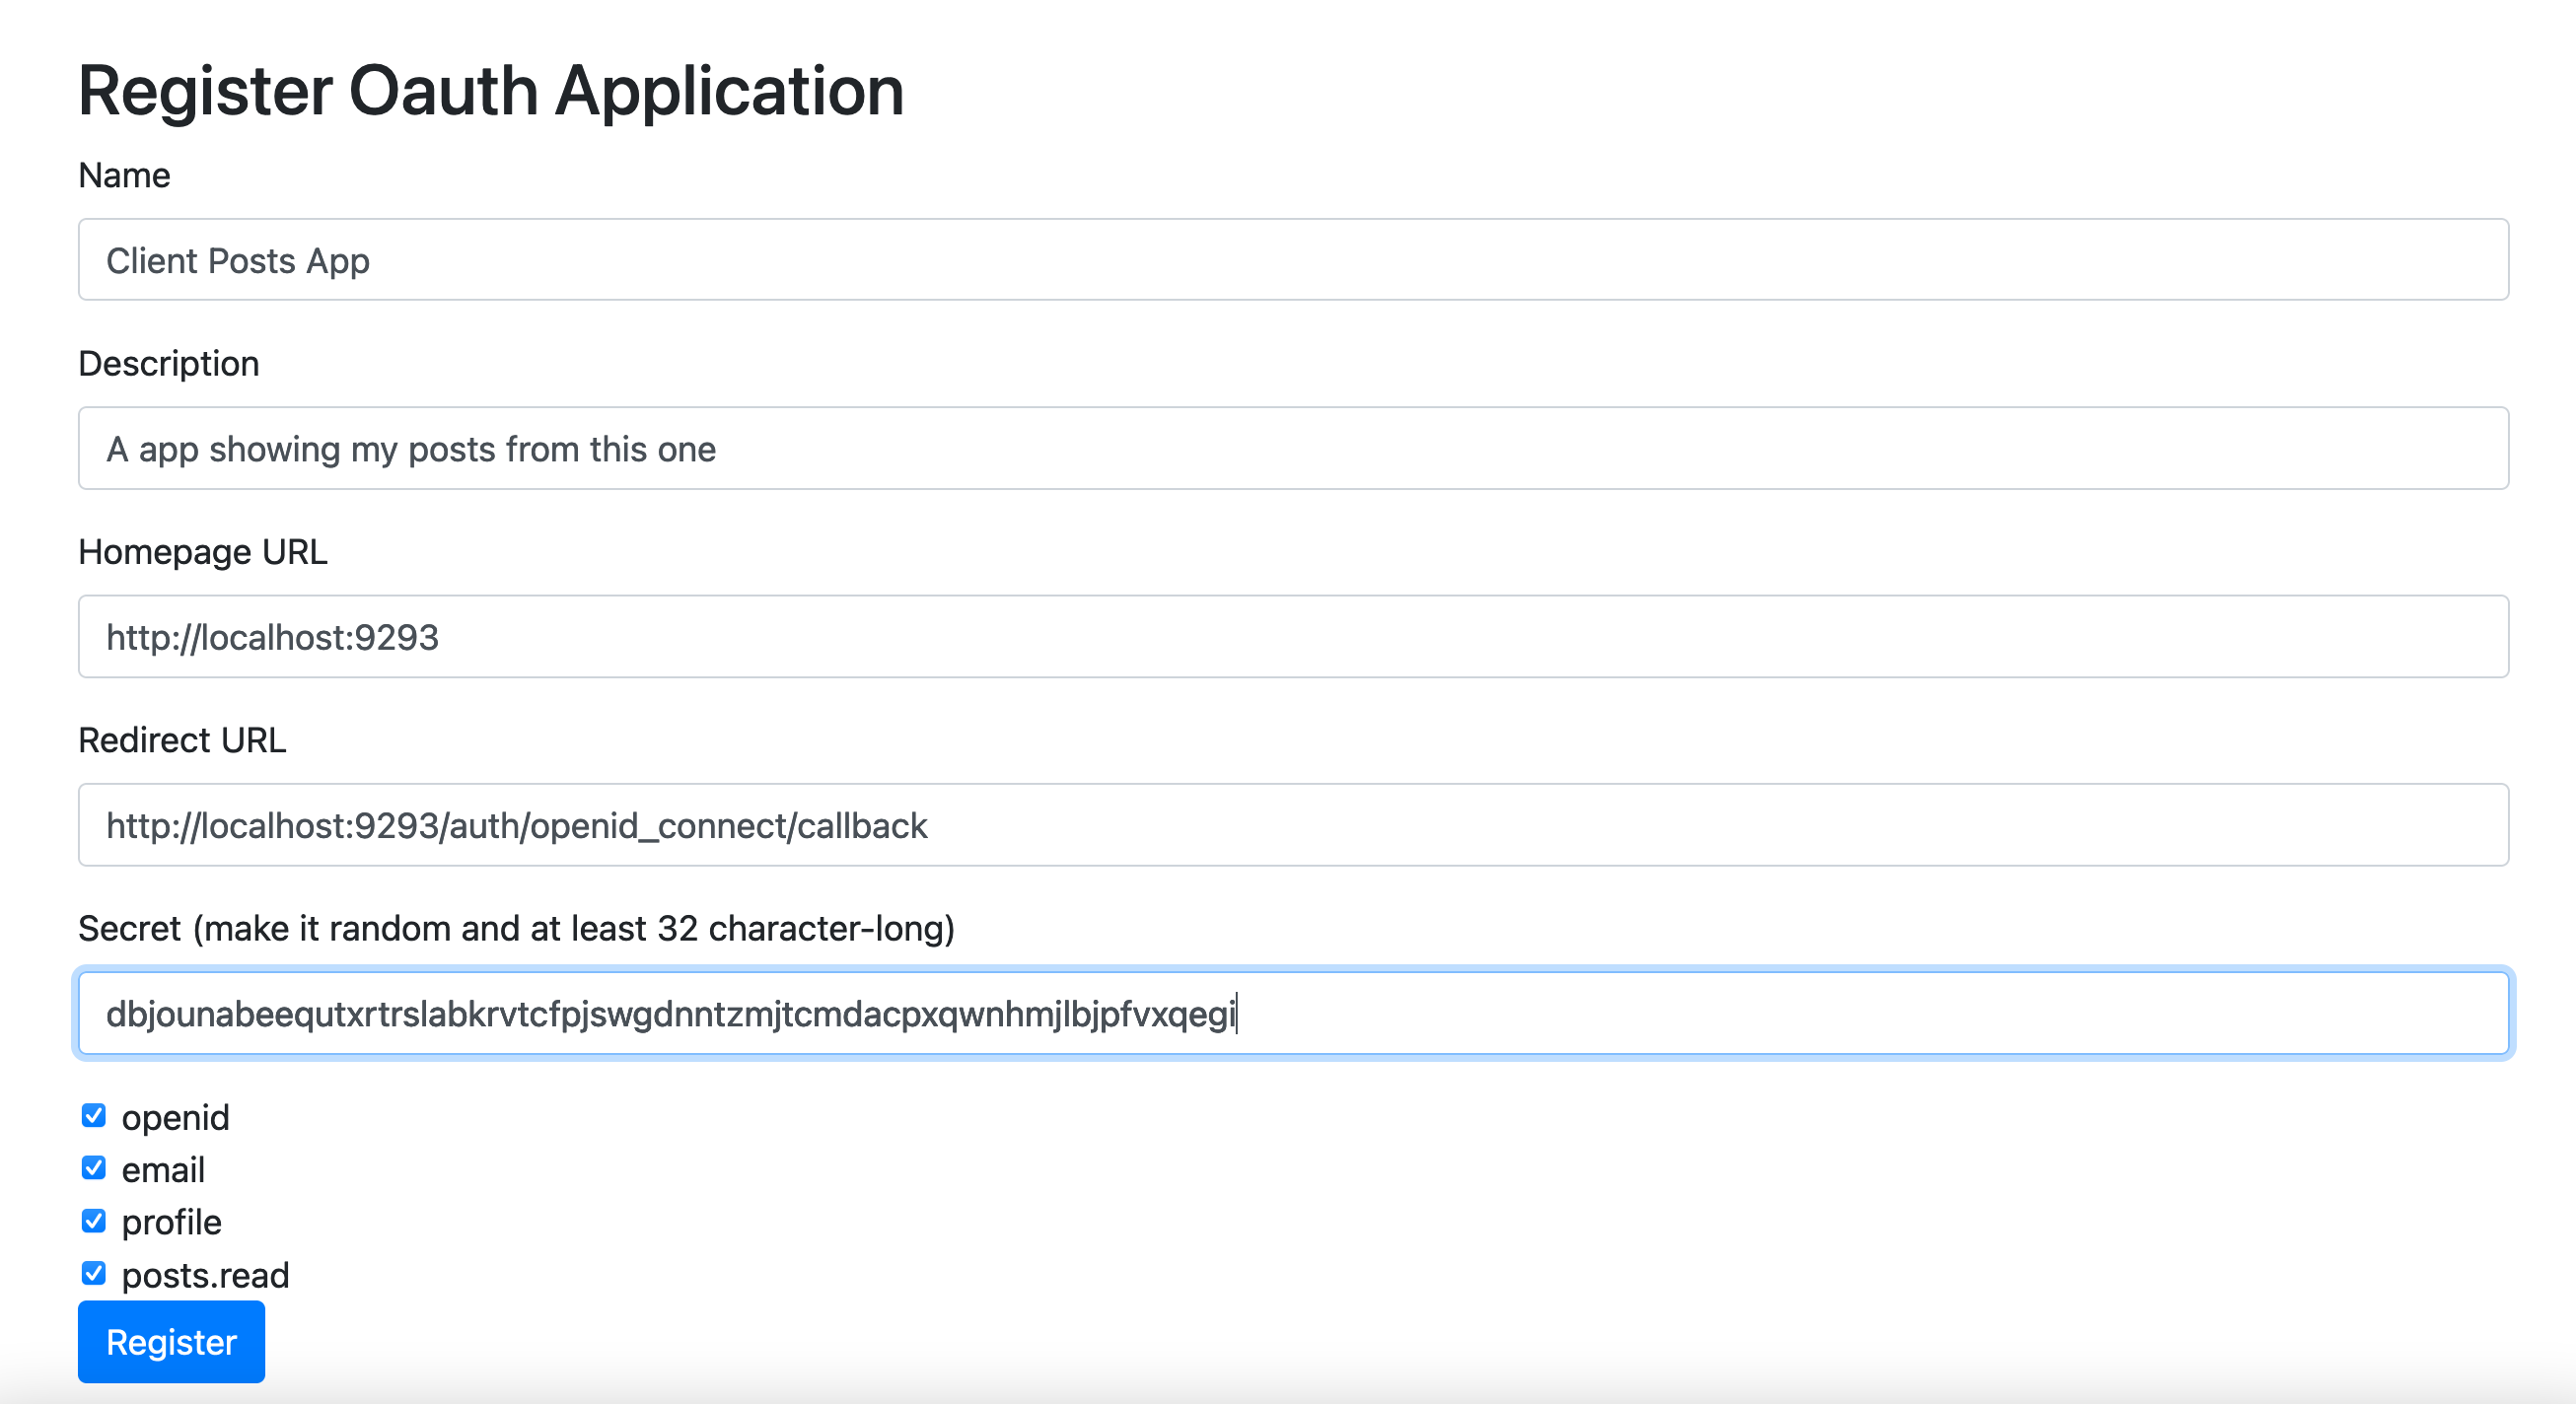
And I submit:
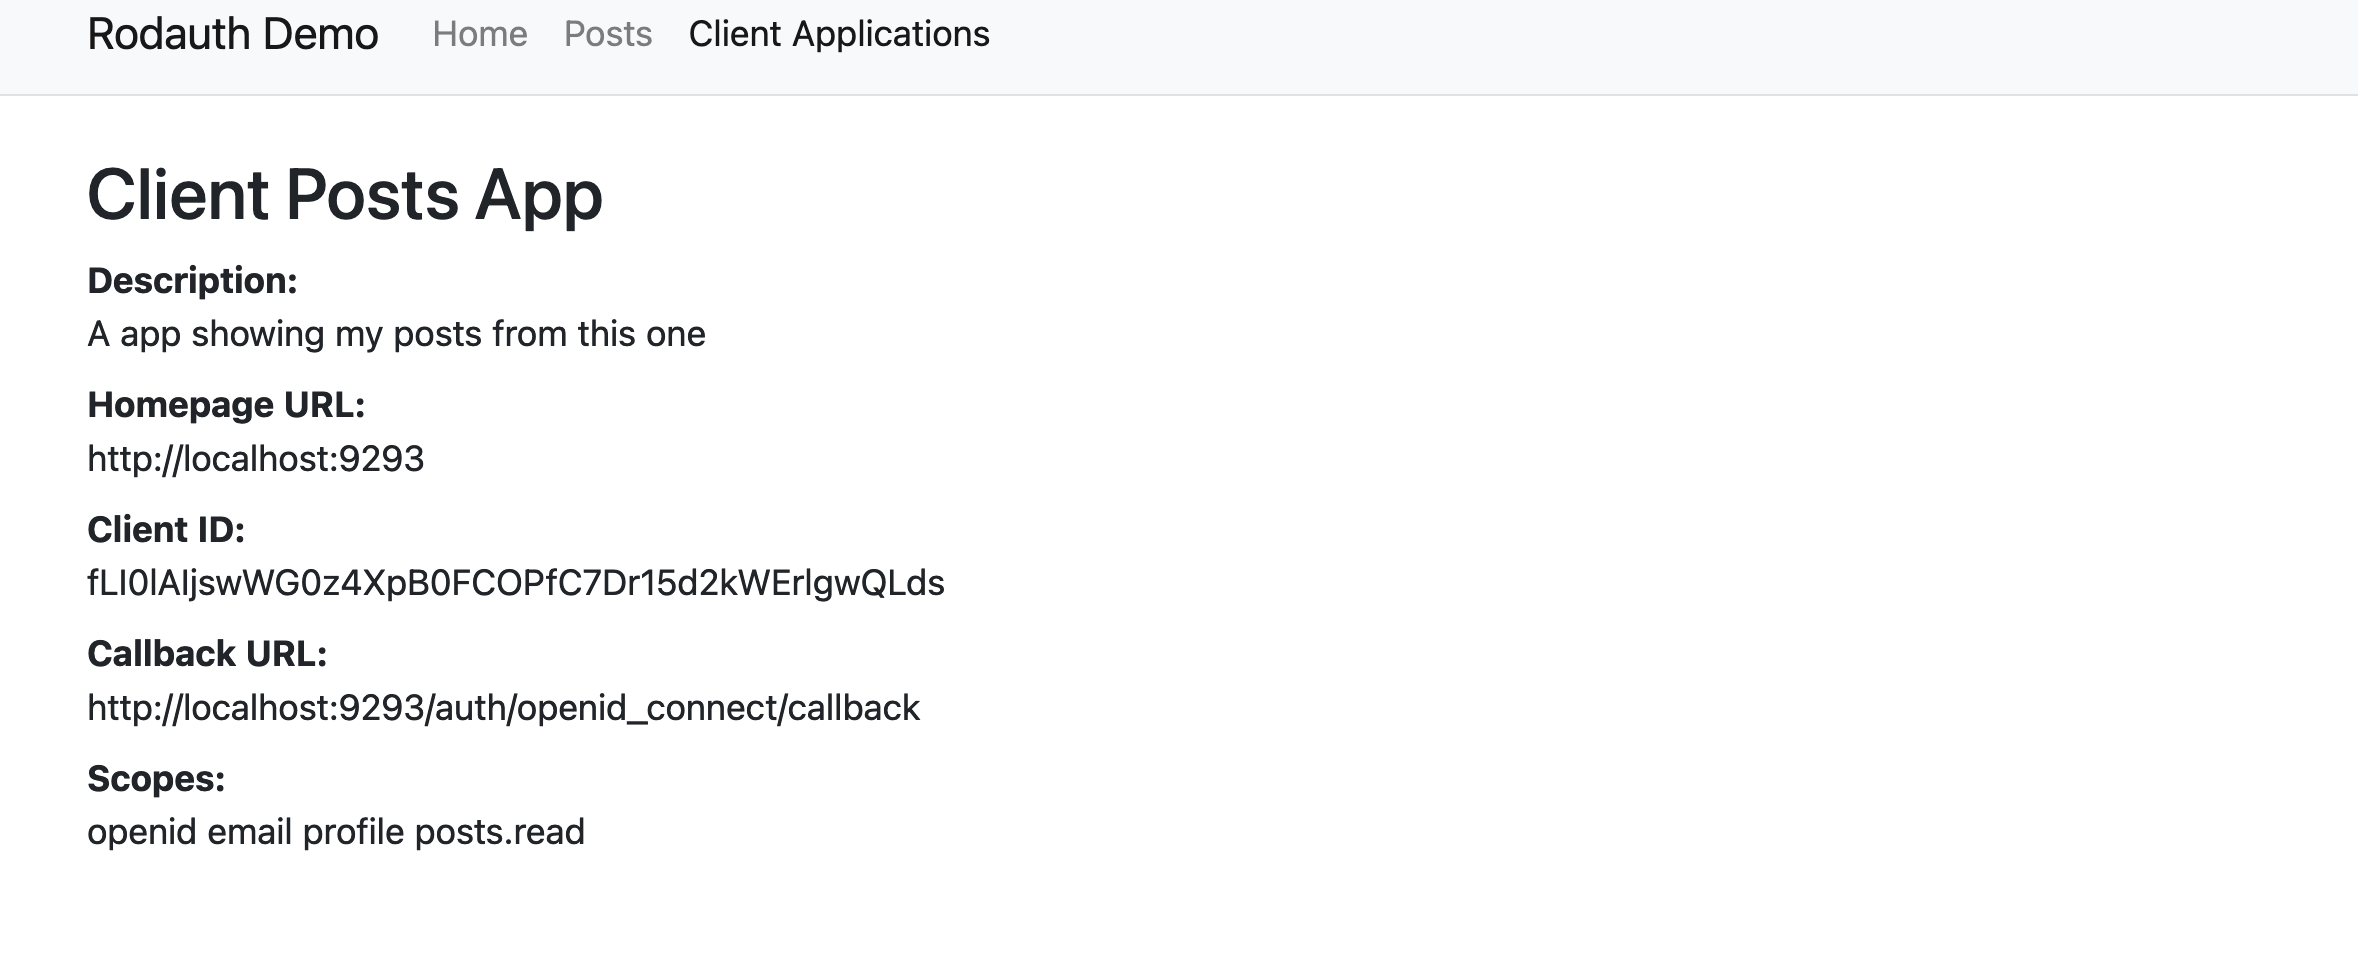
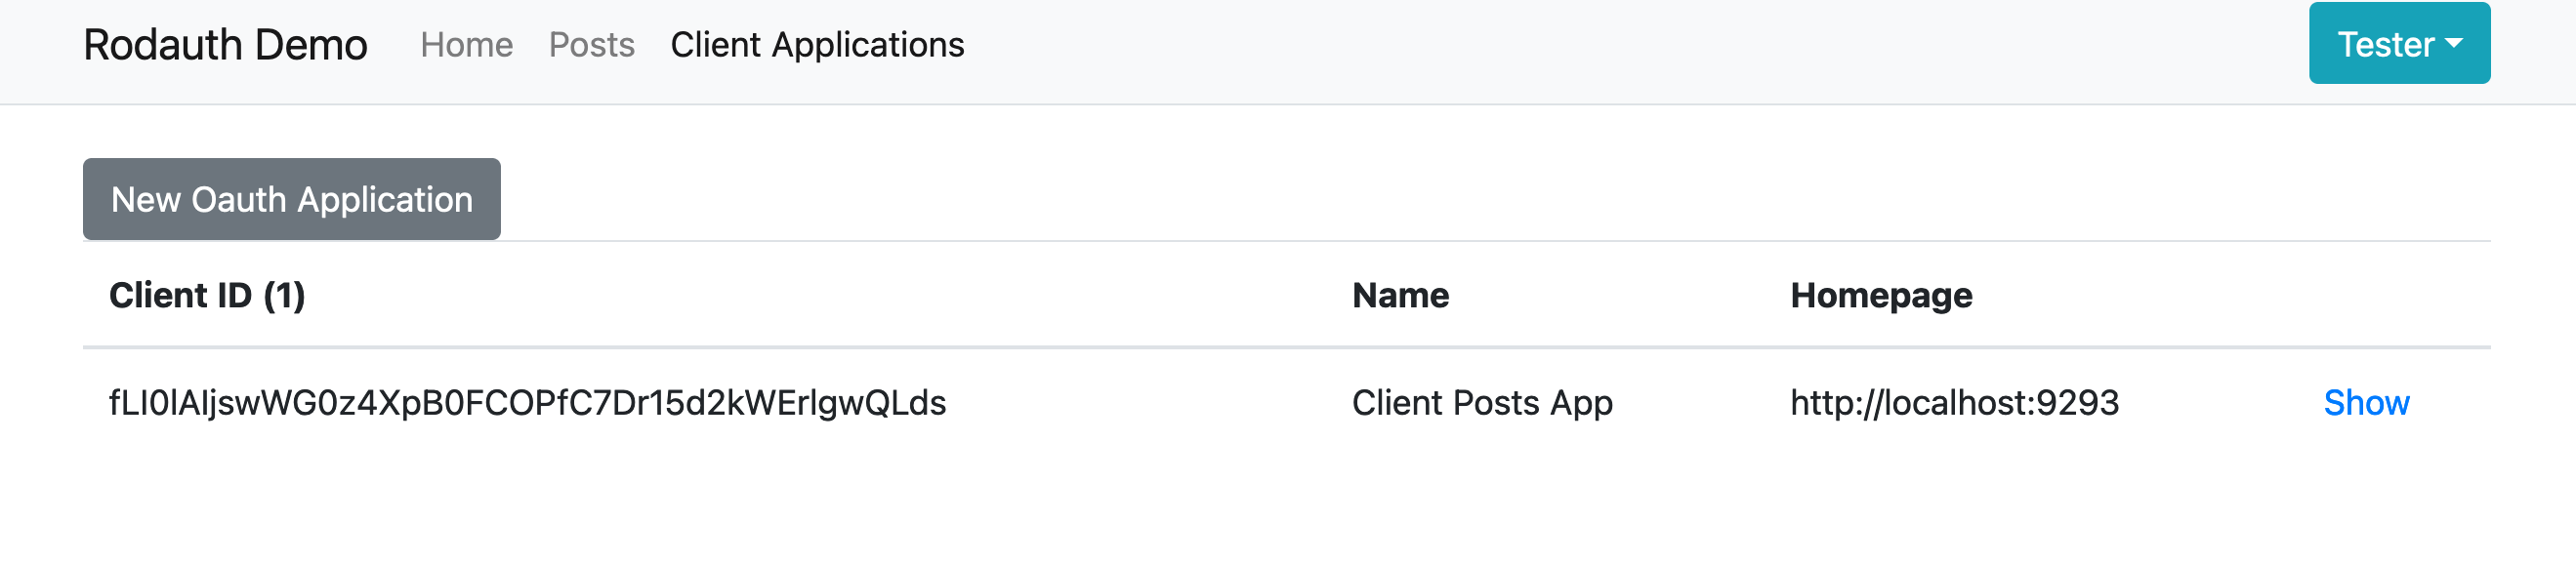
And we have our first Client Application. Success!
3.c Manage clients via the manager
Ok, dashboards are nice, but sometimes you want to provide some “quick to market” OIDC provider solution, without going through the hassle of tinkering on the “self-serve” part of oauth application management, because you have no designer availability, there’s a short initial set of clients to integrate with, and you have account managers, who can collect the data offline and handover the credentials. That’s fine. You can skip 2.4 altogether, and write your own command line ruby script:
client_id = SecureRandom.urlsafe_base64(32)
client_secret = SecureRandom.urlsafe_base64(32)
client_account = Account.find(CLIENT_ID) # you should know this one

OauthApplication.create!(
  account: client_account,
  client_id: client_id,
  client_secret: BCrypt::Password.create(client_id),
  name: "Client Posts App",
  description: "A app showing my posts from this one",
  redirect_uri: "http://localhost:9293/auth/openid_connect/callback",
  homepage_url: "http://localhost:9293",
  scopes: "openid email profile books.read",
)
And decide how you want to pass the credentials to your costumers.
And now, time to integrate with a client!
4. Client Integration
Now we need that “Client Posts App” client to integrate with our OpenID provider. How shall we do this? Fortunately, I’ve got this covered: rodauth-oauth ships with some examples for all supported scenarios, so in this case, I’ll just reuse the OIDC client application, which is a single-ruby-file single-page app listing some books, fetched via an API request authorized via the ID token. The OIDC integration is done via the omniauth-openid-connect gem.
A few tweaks need to be done though, so that this “book app” becomes a “posts app”.
 AUTHORIZATION_SERVER = ENV.fetch("AUTHORIZATION_SERVER_URI", "http://localhost:9292")
-RESOURCE_SERVER = ENV.fetch("RESOURCE_SERVER_URI", "http://localhost:9292/books")
+RESOURCE_SERVER = ENV.fetch("RESOURCE_SERVER_URI", "http://localhost:9292/posts")
# ...
             crossorigin="anonymous"></link>
-      <title>Rodauth Oauth Demo - Book Store Client Application</title>
+      <title>Rodauth Client Posts App</title>
# ...
           <div class="main px-3 py-3 pt-md-5 pb-md-4 mx-auto text-center">
-            <h1 class="display-4">Book Store</h1>
+            <h1 class="display-4">Posts</h1>
# ...
+                 @posts = json_request(:get, RESOURCE_SERVER, headers: { "authorization" => "Bearer #{token}" })
                  <<-HTML
-                  <div class="books-app">
+                  <div class="posts-app">
                     <ul class="list-group">
-                      <% @books.each do |book| %>
-                        <li class="list-group-item">"<%= book[:name] %>" by <b><%= book[:author] %></b></li>
+                      <% @posts.each do |post| %>
+                        <li class="list-group-item"><%= post[:title] %>: <i>"<%= post[:body] %>"</i> %></b></li>
                       <% end %>
# you get the gist...
After adding the necessary dependencies to the Gemfile, I can run it simply as:
> export RESOURCE_SERVER_URI=http://localhost:3000/posts
> export AUTHORIZATION_SERVER_URI=http://localhost:3000
> export CLIENT_ID=fLI0lAIjswWG0z4XpB0FCOPfC7Dr15d2kWErlgwQLds
> export CLIENT_SECRET=dbjounabeequtxrtrslabkrvtcfpjswgdnntzmjtcmdacpxqwnhmjlbjpfvxqegi
> bundle exec ruby scripts/client_application.rb
(NOTE: If you run this with ruby 3, make sure you bundle webrick, or some other rack server, as well).
And then I browse “http://localhost:9293”:
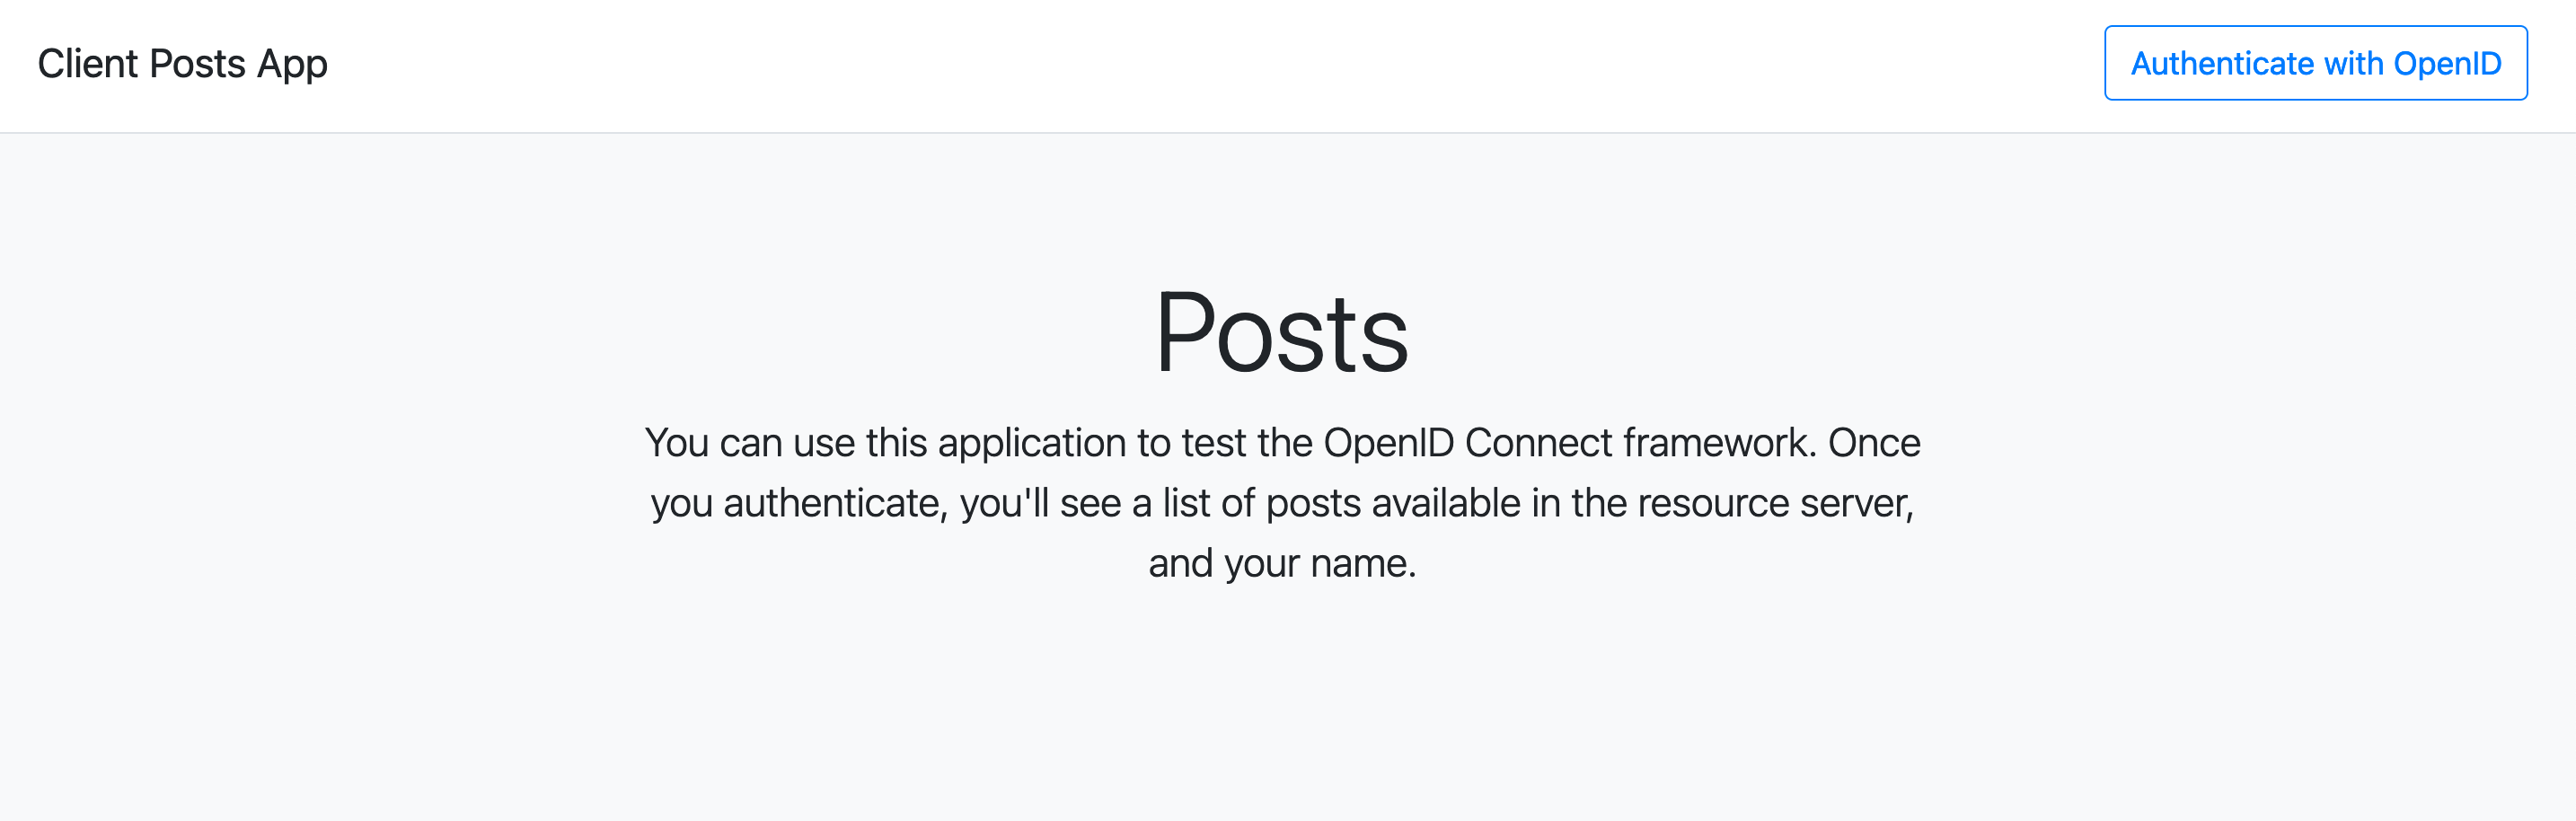
As you see, nothing much to click around besides that top-right big “Authenticate with OpenID” button. When you click it, you are then redirected to our OpenID provider authorization flow, which looks like:
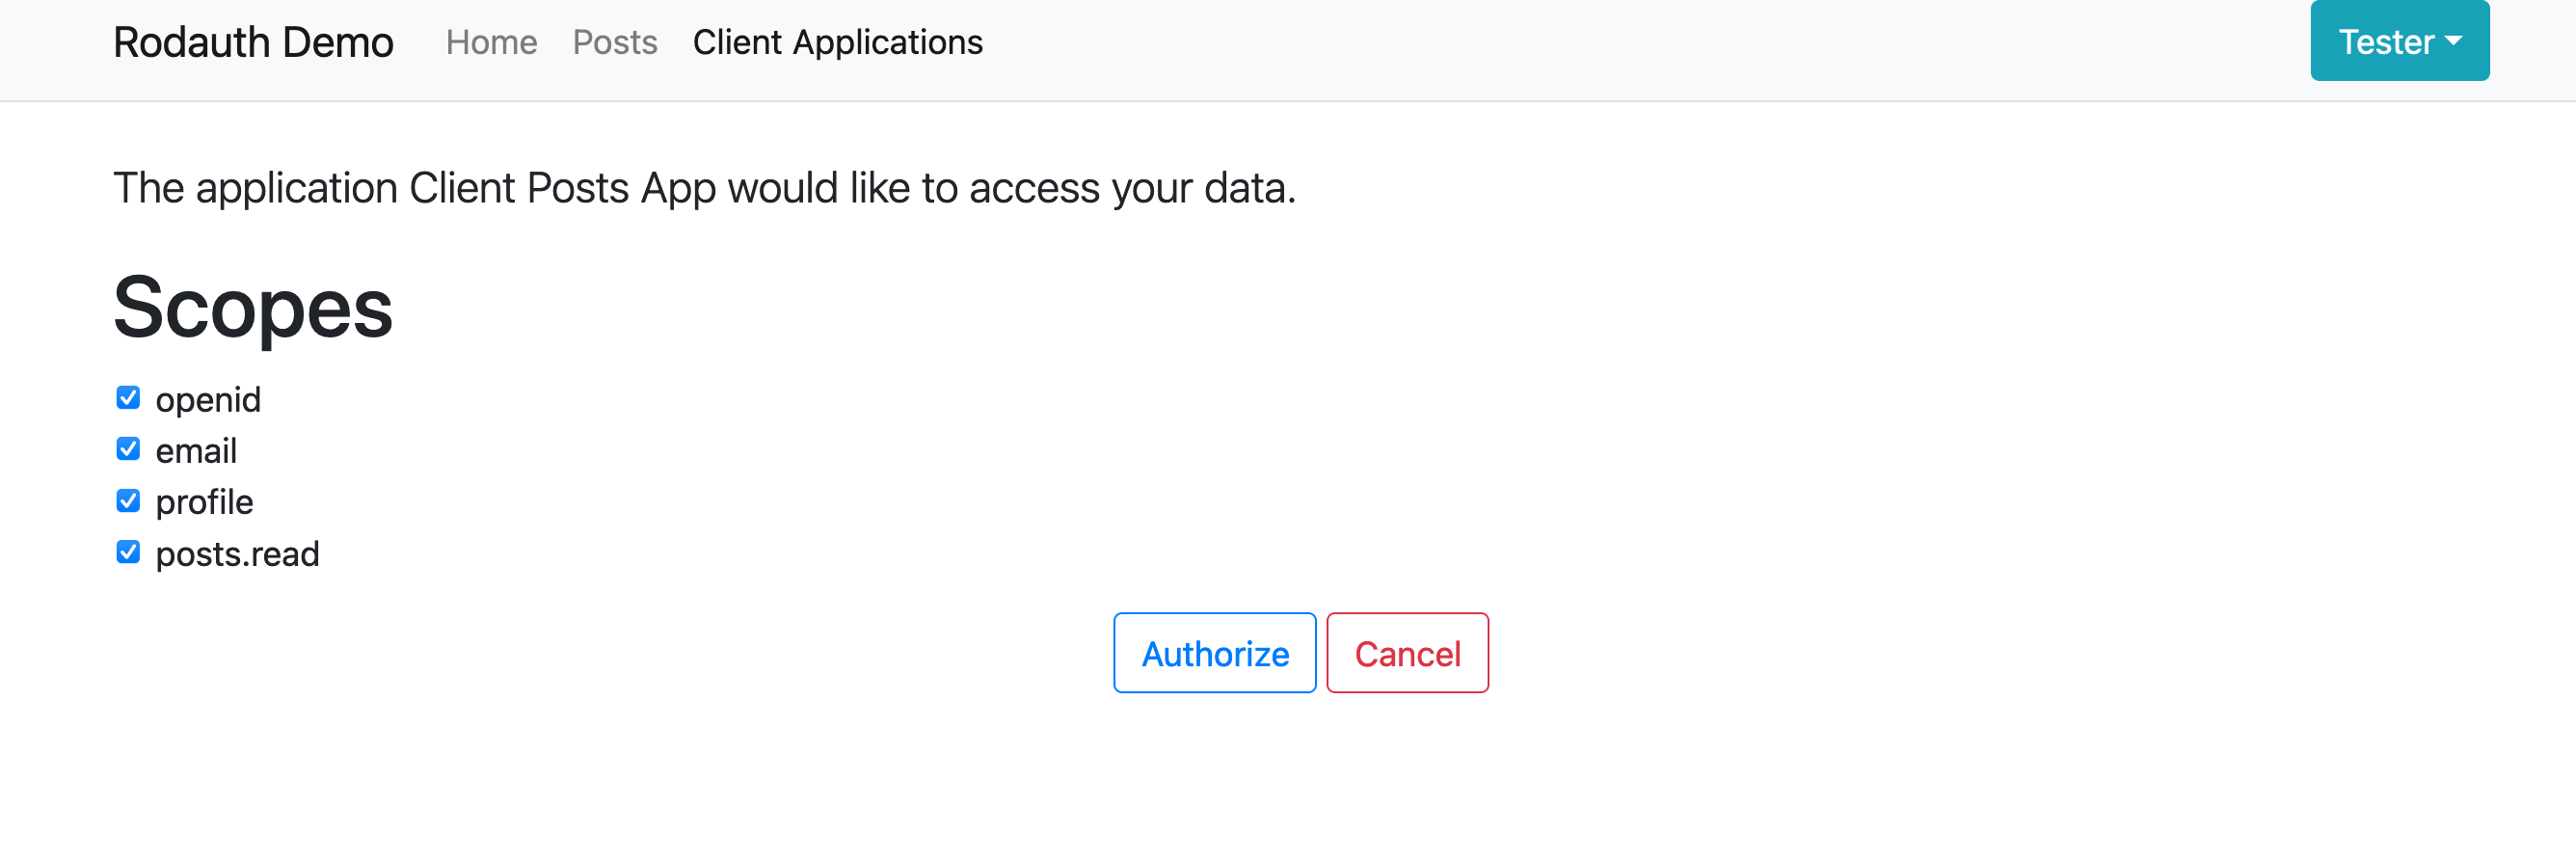
And here we have it: the name of the Client Application, the requested permissions, and the “Authorize” and “Cancel” buttons. Let’s authorize!
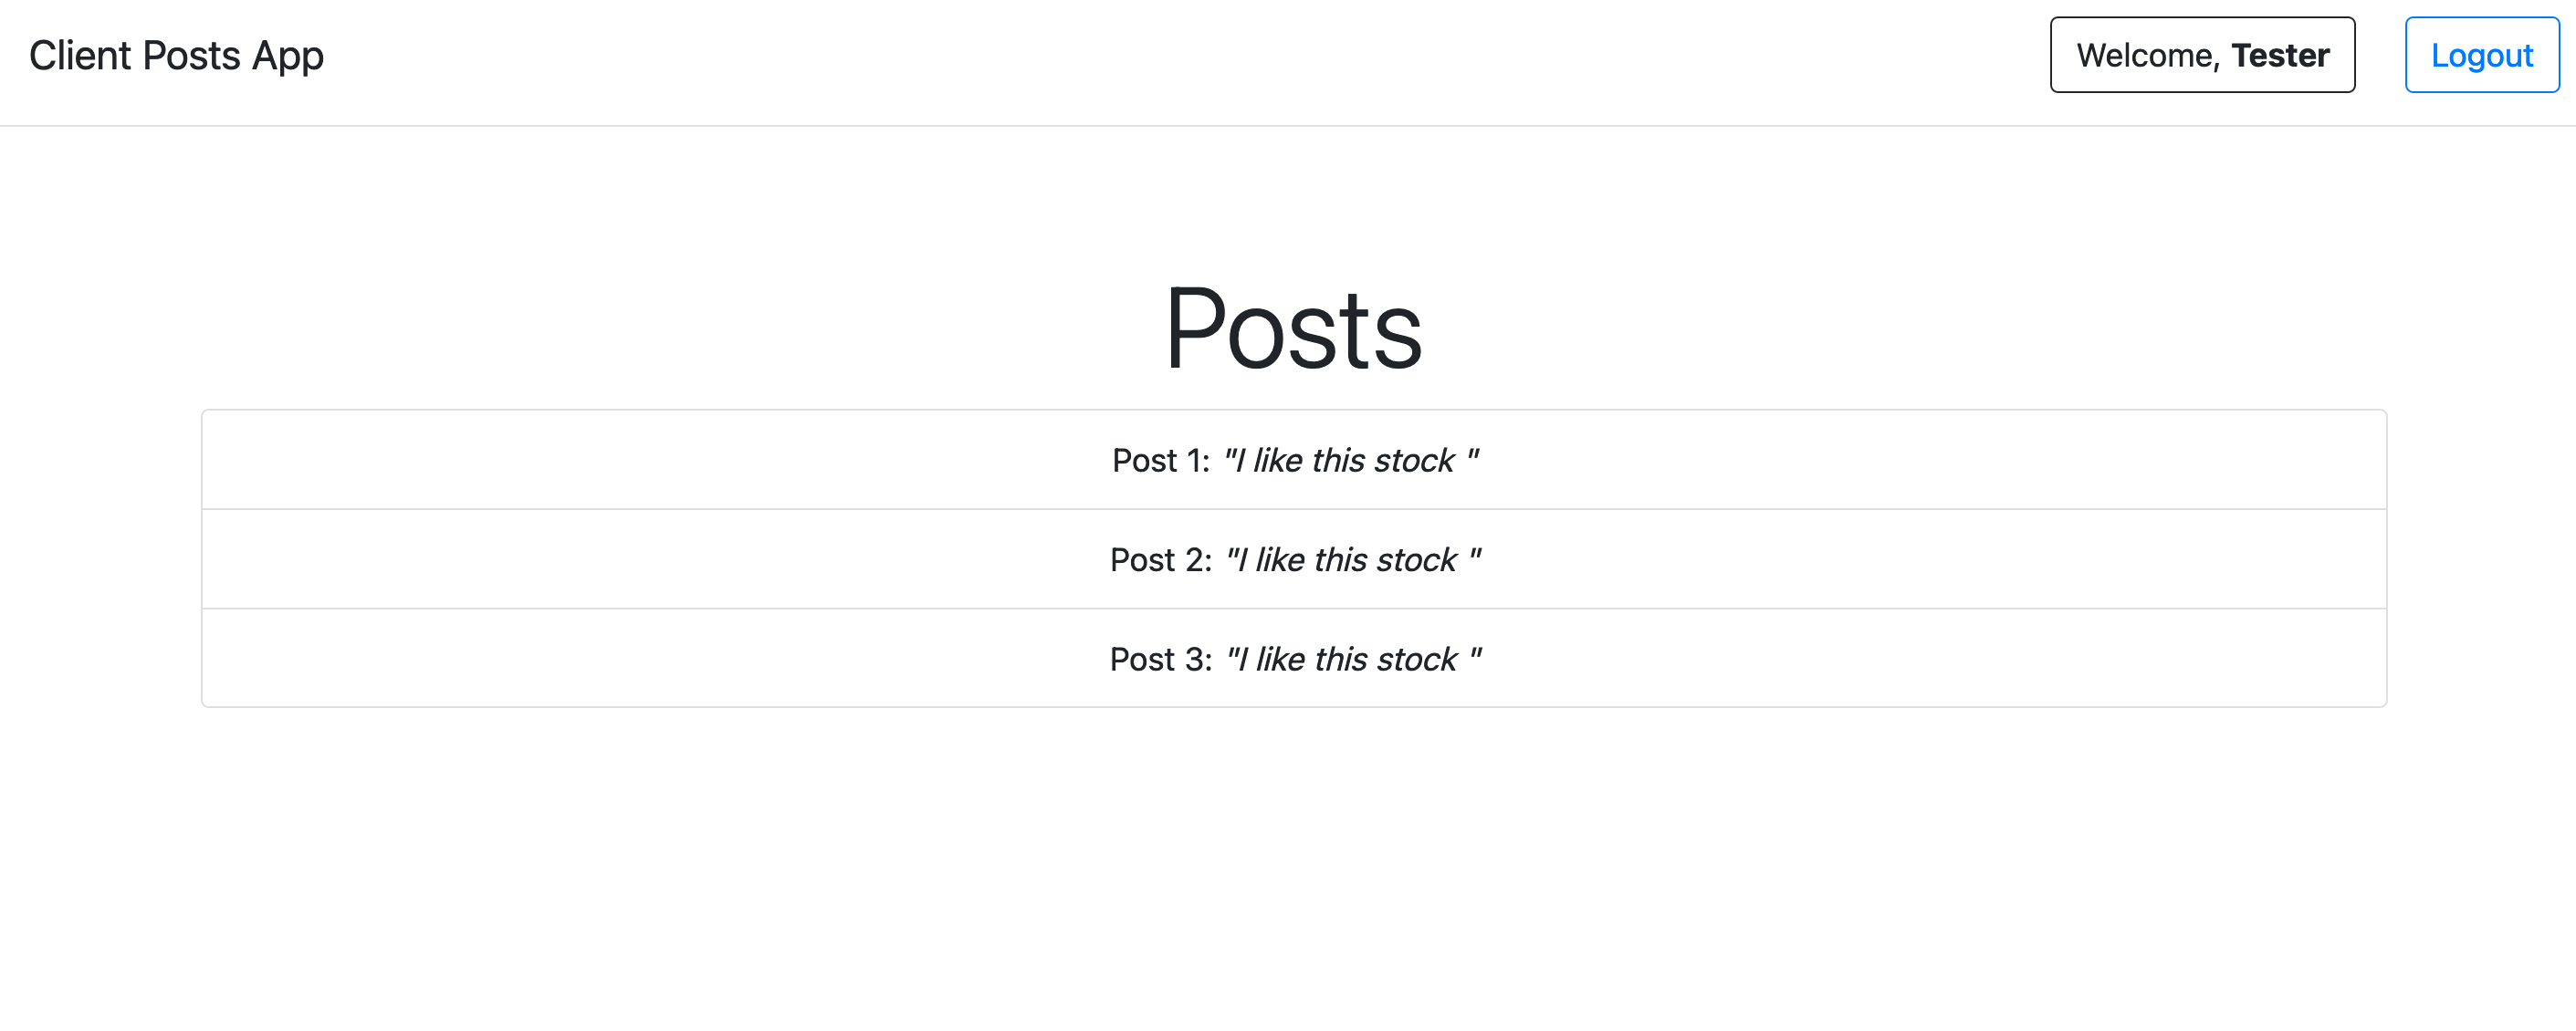
And you’ve just been authenticated via OpenID Connect, congratulations! There’s your OIDC provider username on the top-right corner. And there’s the list of posts authored by you in the posts resource provider.
That’s it. Simple, right?
Leveraging rodauth
The beauty of standing on the shoulders of rodauth is that most security and compliance extensions around authentication you’ll ever need are already built-in. Let’s say that your enterprise customers want to have users 2-factor-authenticated before granting access.
No problem:
# in rodauth_app.rb
before_authorize do
  # at this point they're already logged in
  require_two_factor_authenticated
end
So now I setup TOTP in my test account:

Then I logout and login again with email and password. I go back to my client application:
I press “Authenticate with OpenID”:
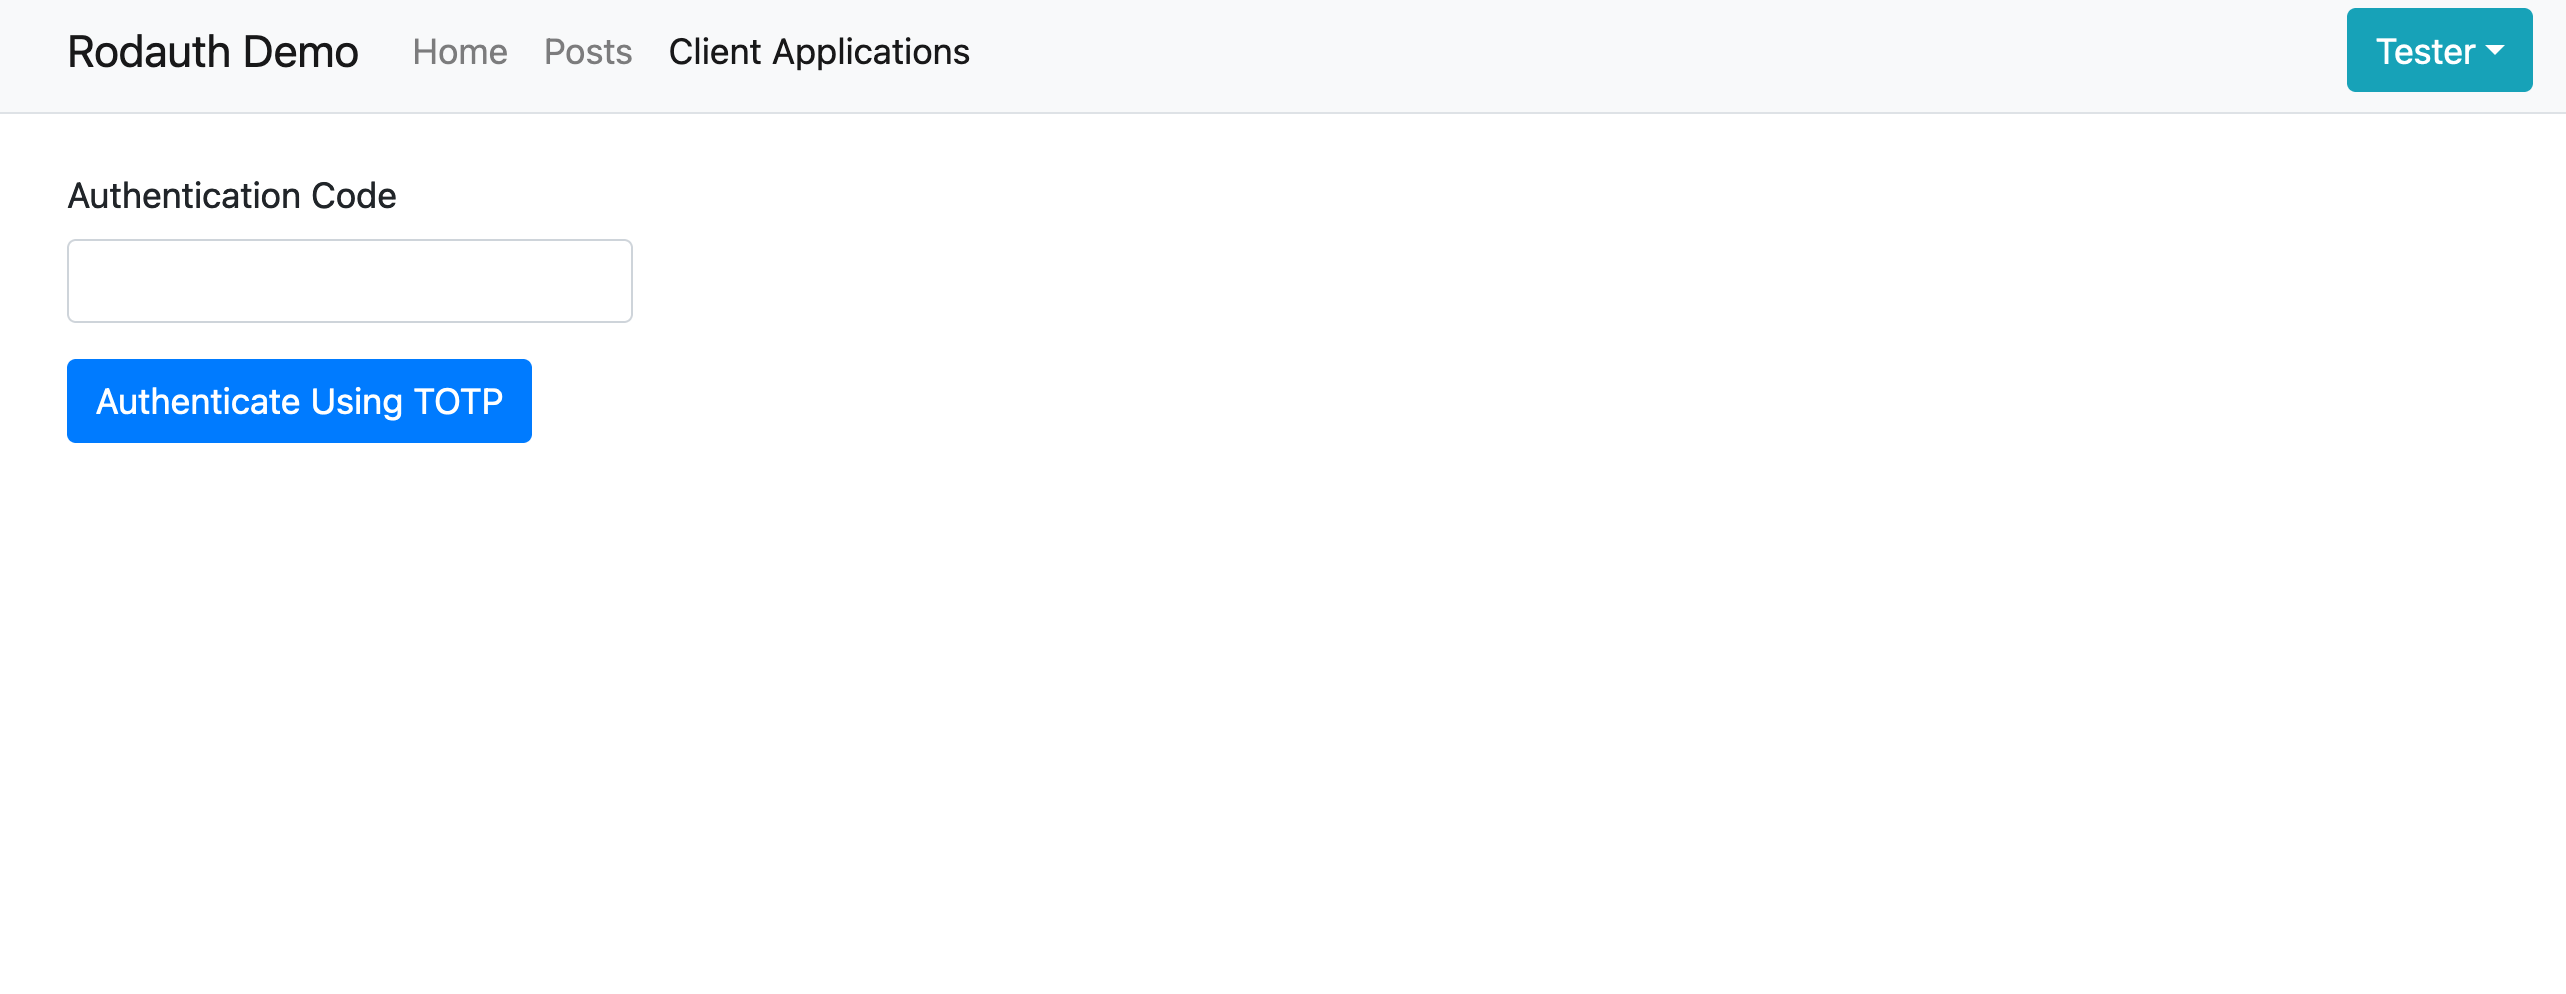
I get requested for my TOTP code. I introduce it:

And I’m back to the Authorization form. It just worked!
Conclusion
It was a very positive experience to put myself on “the other side” and test-drive the integration. I actually ended up discovering a bug or two, which have been fixed in rodauth-oauth v0.5.1 . But overall, it felt good to see the integration unfold in a straightforward way.
I hope that this tutorial delivered the promise of a simple introduction to building OAuth/OIDC providers in rails apps; using generators to “import” models and templates to your project, providing you with a starting point you can build up from, while also providing multiple knobs for oauth.related advanced features (check the project’s wiki for that).
You can find the demo app under this gitlab repository.